How To Fix The Unmountable Boot Volume Error In Windows 10
Reader Question:
“Hi Wally, I’m looking for an answer to this question. I upgraded my computer from Windows 7 professional to Windows 10 Professional. Now, I’m seeing blue screen errors saying Unmountable Boot Volume. I can’t find a solution to this problem.“- Christine E., USA
Before addressing any computer issue, I always recommend scanning and repairing any underlying problems affecting your PC health and performance:
- Step 1 : Download PC Repair & Optimizer Tool (WinThruster for Win 10, 8, 7, Vista, XP and 2000 – Microsoft Gold Certified).
- Step 2 : Click “Start Scan” to find Windows registry issues that could be causing PC problems.
- Step 3 : Click “Repair All” to fix all issues.
Setting up weekly (or daily) automatic scans will help prevent system problems and keep your PC running fast and trouble-free.
Wally’s Answer: Microsoft’s activation statistics show that Windows 10 was activated 75 Million times in the first month of its release. But as with any software, there are problems that might appear in some cases. Here we will tell you how to solve the unmountable boot volume issue.
Problem
The unmountable boot volume error appears and Windows 10 Professional fails to boot normally.
Cause
The unmountable boot volume error can be caused by:
- A faulty hard drive.
- A corrupt boot partition.
- Corrupt Windows files.
Solution
Here are some ways to solve the unmountable boot volume error:
Boot Your Computer With The Windows 10 DVD/USB
You can do this easily if you already have a bootable Windows 10 DVD or USB on hand. If you don’t, then you can download one using the Media Creation Tool.
Make sure to download the correct version of Windows 10. You will need to know which Windows 10 version to download. You can find that information on this page. If you’re using Windows 10 Pro then select Windows 10 Professional.
Automatic Startup repair
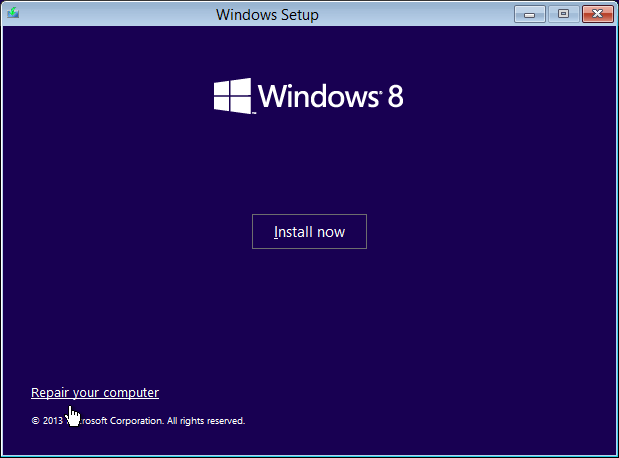
- Boot your computer using the Windows 10 DVD or USB
- You should see the Windows Setup screen. Click Repair your computer as shown in the image below.
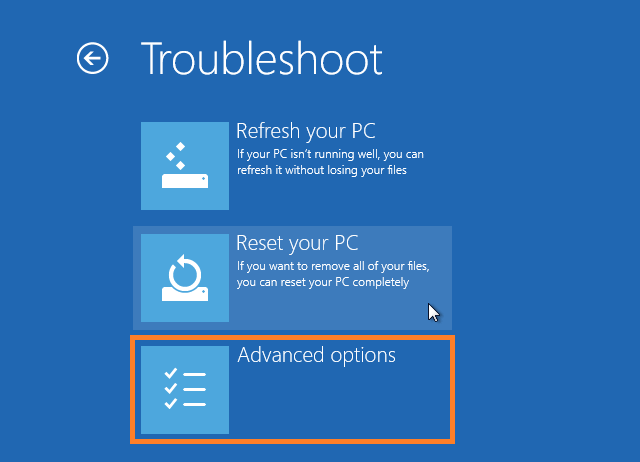
- Click the Troubleshoot tile
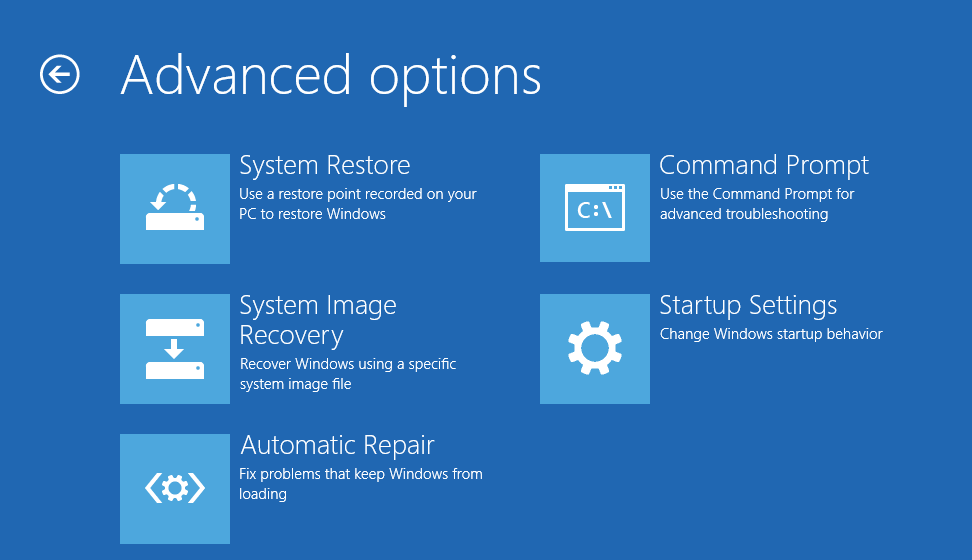
- Click the Advanced Options tile
- Click Automatic Repair and wait for the process to complete.
Use The SFC /SCANNOW Command
The SFC command can be used to replace corrupt and missing system files. Here’s how to use it:
- In the Command Prompt window, type sfc /scannow > Press Enter
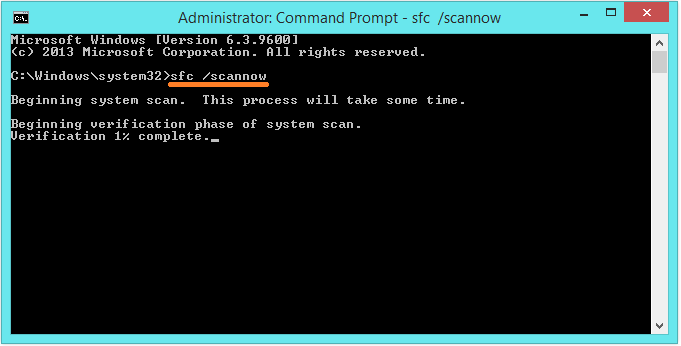
- You can also try using the chkdsk /r command in addition to the sfc /scannow command.
If all else fails then try using the Windows Recovery options to reinstall Windows.
I Hope You Liked This Blog Article! If You Need Additional Support on This Issue Then Please Don’t Hesitate To Contact Me On Facebook.
Is Your PC Healthy?
I always recommend to my readers to regularly use a trusted registry cleaner and optimizer such as WinThruster or CCleaner. Many problems that you encounter can be attributed to a corrupt and bloated registry.
Happy Computing! ![]()

Wally's Answer Rating
Summary: Every Windows Wally blog post is evaluated on these three criteria. The average of all three elements determines an "Overall Rating" for each blog post.
4.1
Overall Rating
About the Author
Wally PhillipsWindows Wally is a helpful guy. It’s just in his nature. It’s why he started a blog in the first place. He heard over and over how hard it was to find simple, plain-English solutions to Windows troubleshooting problems on the Internet. Enter: Windows Wally. Ask away, and he will answer.
Related Posts

How To Stop Windows 10 From Installing Upgrades? →

Audio Not Working in Windows 10 →
How to Solve Application Error 0xc0000142 and 0xc0000005 →